 Save
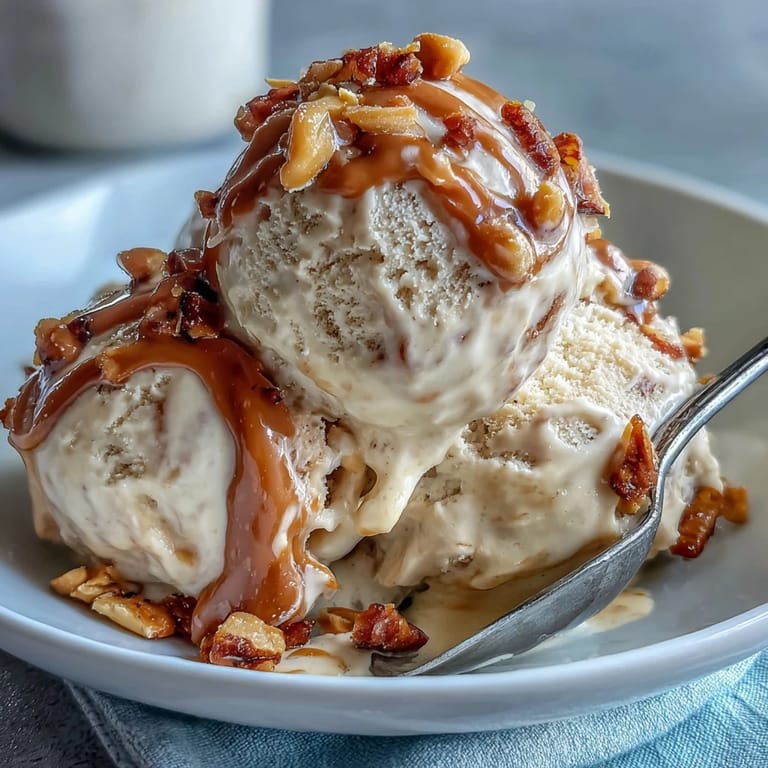
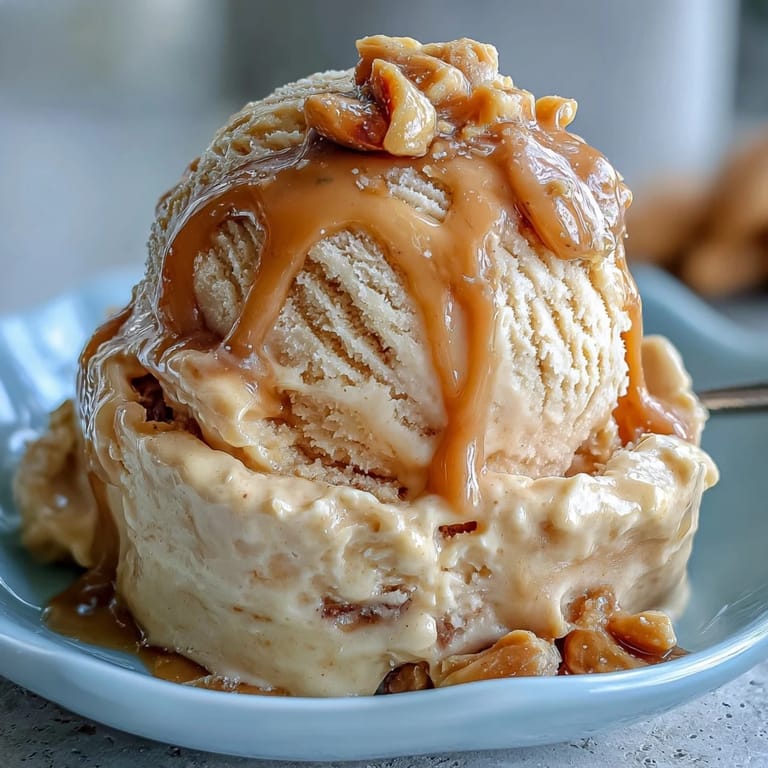
Save The steady buzz of my blender always reminds me of lazy Saturdays when the craving for something sweet—and just a little wholesome—strikes. It wasn’t until one sticky summer day, bananas browning on the countertop, that the idea for this peanut butter banana ice cream hit me. The aroma of ripe bananas mingling with the warm scent of peanut butter filled my kitchen, and suddenly I had a creamy, cold treat with almost no effort. What began as a bit of improvisation soon became my favorite way to satisfy a sweet tooth, dairy-free and all. The best part? It’s the kind of recipe you can make with sleepy eyes and no measuring cups if you must.
Once, a friend dropped by unexpectedly, so I tossed everything into the food processor while we chatted about work and weekend plans. We watched the bananas transform while the kitchen filled with the aroma of vanilla, and even her skeptical grin faded at the first taste. Sometimes the best moments are frozen, not planned.
Ingredients
- Ripe bananas: The more overripe your bananas, the sweeter and creamier the finished ice cream—don’t be shy about spots.
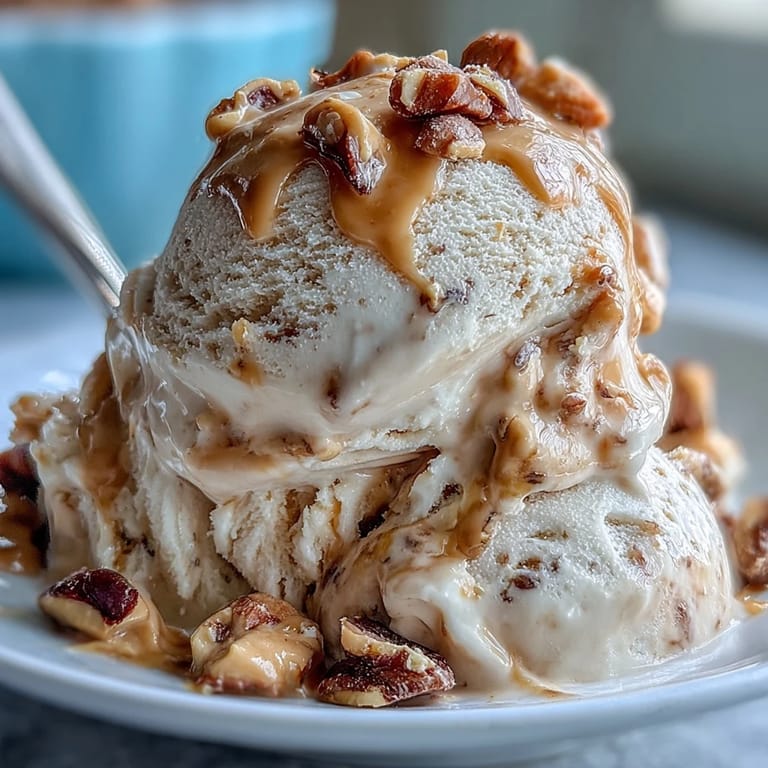
- Creamy peanut butter: Smooth or natural both work, but I’ve learned that a classic, well-stirred jar gives the richest flavor.
- Maple syrup (or honey): Just a splash helps balance the nutty richness—try both and see which you prefer.
- Vanilla extract: A teaspoon elevates the whole batch and brings out the natural sweetness.
Tired of Takeout? 🥡
Get 10 meals you can make faster than delivery arrives. Seriously.
One email. No spam. Unsubscribe anytime.
Instructions
- Freeze your bananas:
- Lay your banana slices on parchment and freeze them totally solid for at least 2 hours it makes for a smoother scoop later.
- Gather and prep:
- Once your bananas have hardened, grab your food processor or blender and keep all ingredients close—you’ll want to work quickly.
- Blend to perfection:
- Pulse everything until velvety, pausing to scrape down the sides so nothing sneaks away from the blades.
- Choose your texture:
- If you love soft-serve, dive in right away for a fluffy treat—if you want firmer scoops, smooth the mixture into a pan and freeze it again for at least another hour.
- Scoop and serve:
- Use your ice cream scoop to serve generous swirls, ideally before it melts from all your anticipation.
 Save
Save I once served this at a picnic, and it was the first dish to vanish—so quickly that I wished I’d saved a scoop for myself. That’s when I realized it’s not just a simple dessert, but a little scoop of satisfaction that brings everyone together, no matter their cravings.
Helpful Freezer Tips
If you’re planning ahead, you can freeze peeled banana slices in a single layer in a zip-top bag—just make sure they don’t clump or you’ll be chiseling them apart later. Letting the finished ice cream sit out for 5 minutes before scooping makes serving so much easier and keeps your arms from an unexpected workout.
Tasty Variations to Try
This recipe is a blank canvas; I’ve swirled in chocolate chips for crunch, dropped in a pinch of cinnamon for warmth, or added a swirl of melted chocolate for a richer finish. Even a handful of roasted peanuts brings a happy surprise in every spoonful. Don’t hesitate to experiment—sometimes the best combinations come from what you already have on hand.
Making It Your Own: Allergy and Substitution Ideas
For friends with nut allergies, sunflower seed butter works surprisingly well, though the flavor is a bit earthier—test a tiny batch first. Always double-check labels when making swaps, especially for folks with sensitive allergies. I often jot notes on the container lid to remind myself which nut butter or add-in I used last time, just in case I want to repeat a winner.
- Try not to skip the vanilla; it adds a finishing touch you’ll miss otherwise.
- Sliced bananas freeze fastest when spread out—not piled up.
- Have some extra toppings or fresh fruit ready when you serve—it feels like a celebration.
 Save
Save Whether you’re eating it solo or sharing spoons with friends, this ice cream is pure, cheerful fun—a little effort for a big reward.
Recipe FAQs
- → How do I achieve a smoother, creamier texture?
Use very ripe bananas and a high-powered blender or food processor. Let the frozen slices sit 3–5 minutes at room temperature before blending and scrape down the sides frequently to ensure an even, silky churn-free texture.
- → Can I substitute the peanut butter?
Yes. Almond or cashew butter work well for milder flavors. Use the same amount; thicker nut butters may yield a richer mouthfeel while runnier ones can be slightly less firm after freezing.
- → How long can the frozen dessert be stored?
Store in an airtight, freezer-safe container for up to 2–3 weeks. Press a piece of parchment onto the surface before sealing to reduce ice crystals. Thaw a few minutes at room temperature before scooping.
- → How can I add texture or mix-ins?
Fold in chocolate chips, chopped nuts, cookie crumbs, or swirls of nut butter before the final freeze for added crunch and contrast. Add bright elements like chopped frozen berries for bursts of flavor.
- → Is the sweetener optional or interchangeable?
Yes. Maple syrup lends depth and keeps the blend smooth, but honey (if not strictly vegan), agave, or a touch of brown sugar can be used to taste. Adjust quantity depending on banana ripeness.
- → How do I prevent freezer burn or icy texture?
Seal tightly in a freezer-safe container and minimize air contact. Allow the mixture to firm up in a cold section of the freezer and avoid repeated thaw-refreeze cycles to maintain a creamy texture.