 Save
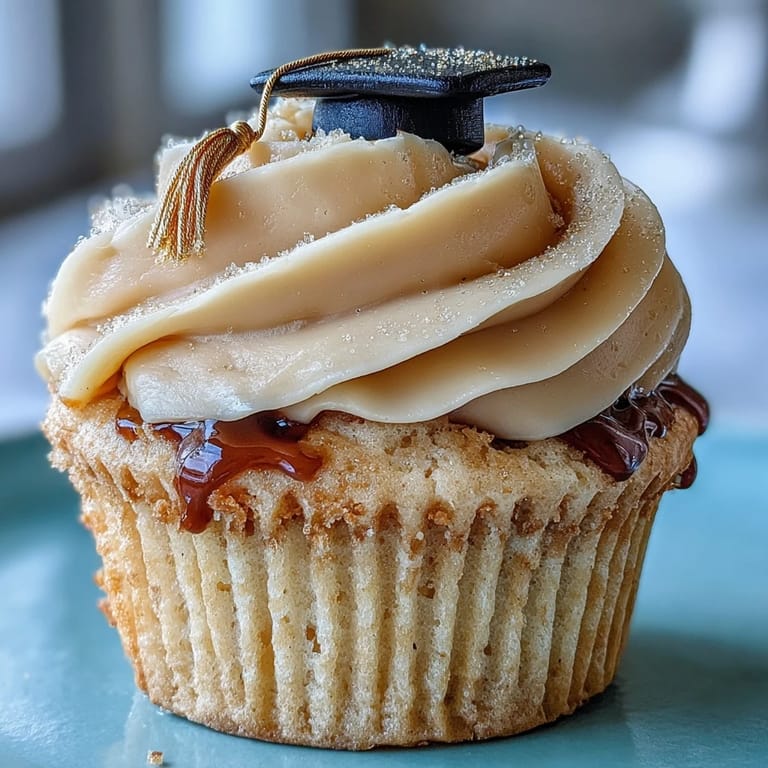
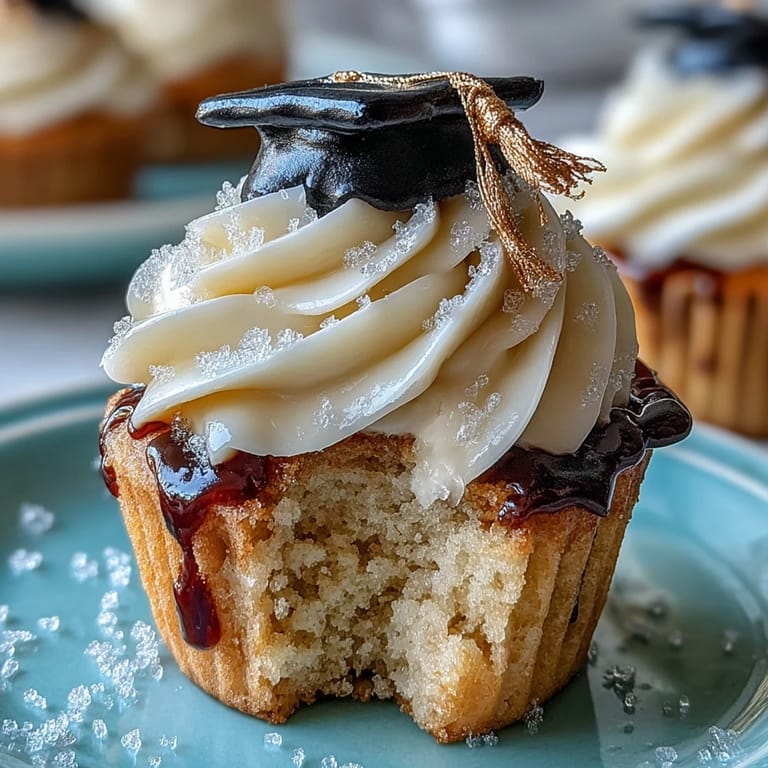
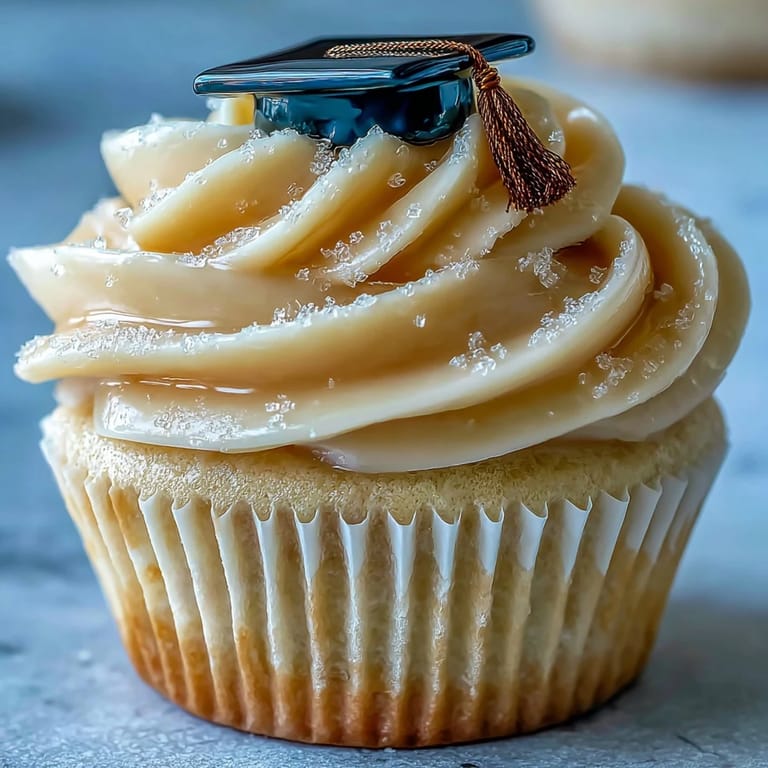
Save The lure of a kitchen filled with the scent of warm vanilla and sugar always pulls me in, but nothing compares to the anticipation of making graduation cupcakes bedecked with shiny fondant caps. One rainy afternoon, I was given the task to whip up these celebratory treats for my cousin's graduation, and the laughter that echoed as we handcrafted each cap truly surprised me. There is something absurdly satisfying about seeing a tray of golden-topped cupcakes transform a simple family kitchen into a stage for celebration. The occasional splatter of buttercream and stray flecks of edible gold only added to the fun chaos. It's the kind of recipe that turns a baking session into a memory-making event.
I still remember that moment when my little brother peeked over the countertop, eyes widening as I balanced a tiny gold fondant tassel onto each cap. He insisted on being the official 'taste tester,' and somehow managed to convince me we needed 'just one more' for quality control. Our kitchen turned into a confetti-strewn assembly line, with graduation music playing from someone’s phone and the sweet chaos of multitasking between piping swirls and sculpting fondant. What began as an excuse to bake soon became the centerpiece of our family’s pre-graduation bash. Looking back, I think the cupcakes connected us almost as much as the occasion itself.
Ingredients
- All-purpose flour: Provides the base structure for the cupcakes – I always sift it to avoid pesky lumps.
- Baking powder: Just a teaspoon and a half gives enough lift for a fluffy crumb; make sure it’s fresh for best results.
- Salt: Only a pinch is needed, but it sharpens the sweetness and balances the flavor.
- Unsalted butter: Essential for truly tender cupcakes and a buttery frosting; let it come to room temperature or you’ll be fighting stiff batter.
- Granulated sugar: Sweetens the cake, but also helps create that coveted golden crust – a tip from my aunt: cream it long enough for extra airiness.
- Eggs: Bind everything together and add richness – I always crack one into a small bowl first to avoid any shell surprises.
- Vanilla extract: Don’t skimp – it’s the heart of the flavor in both cake and frosting.
- Whole milk: Makes the cupcakes moist and soft; add it gradually for smoother batter.
- Powdered sugar: Sift for lump-free, cloudlike buttercream; I learned the hard way that skipping this step leads to gritty icing.
- Black fondant: Exact shade matters, so knead it thoroughly for a silky finish on the graduation caps.
- Gold fondant: Adds that celebratory touch; I found gently rolling it prevents sticky fingers.
- Edible gold dust (optional): A trick I picked up: dust lightly with a dry brush for subtle sparkle without a metallic overload.
- Cornstarch: Dust your counter for rolling so fondant doesn’t cling to your kitchen surface like a stubborn relative.
- Edible adhesive or water: Just a tiny dot holds the fondant pieces together; too much and things start sliding everywhere.
Tired of Takeout? 🥡
Get 10 meals you can make faster than delivery arrives. Seriously.
One email. No spam. Unsubscribe anytime.
Instructions
- Prep the oven and pans:
- Set your oven to 350°F (180°C) and slide cupcake liners into your muffin tin with a little flourish – it sets the stage.
- Mix the dry ingredients:
- In a medium bowl, blend flour, baking powder, and salt with a whisk; listen for that soft whoosh as the powders combine.
- Cream the butter and sugar:
- With your mixer on medium, beat softened butter and sugar until fluffy and pale, scraping the bowl halfway – keep going until it almost looks like whipped cream.
- Add eggs and vanilla:
- Crack in eggs one at a time, blending well; pour in vanilla, and breathe in that sudden rush of sweet aroma.
- Combine wet and dry ingredients:
- Add the flour mixture in thirds, alternating with milk, mixing gently after each addition just until it looks smooth and creamy.
- Fill and bake:
- Spoon batter evenly into liners – don’t overfill – then bake for 18–20 minutes, or until golden and a toothpick comes out clean.
- Cool the cupcakes:
- Let the cupcakes sit in the pan a few minutes, then transfer them to a rack; resist the urge to frost while they’re still warm.
- Make the buttercream frosting:
- Beat butter until creamy, then gradually whip in powdered sugar, milk, vanilla, and salt until it’s light and softly peaks.
- Frost the cupcakes:
- Scoop the frosting into a piping bag or simply swirl it on with an offset spatula – smooth or dramatic, both work.
- Create the fondant caps:
- Roll black fondant on cornstarch-dusted surface, cutting twelve neat squares and sculpting matching bases – channel your inner child with playdough skills.
- Assemble the caps:
- Affix each cap top to its base with a dab of edible glue or water; gently press to secure.
- Add gold tassels:
- Shape golden fondant ropes, curve each over a cap, and finish with a tiny gold ball for the button before a gentle shimmer of gold dust.
- Decorate and serve:
- Top each frosted cupcake with its fondant cap, then stand back and admire your edible graduation parade.
 Save
Save There’s a moment just before the party starts when the cupcakes are all lined up on the table, and the room goes quiet for a second – all eyes drawn to those shiny, cap-topped treats. That hushed excitement made me realize these weren’t just sweets, but little trophies celebrating hard-won achievements.
Getting Kids Involved Can Be Hilarious
Inviting kids to shape the fondant pieces turns the kitchen into a scene of giggles and silly mistakes – fondant tassels end up in wild shapes, and sometimes the caps are more whimsical than precise. But honestly, those wonky hats are always the first ones picked at parties, and it breaks the ice for adults and kids alike.
Why Your Butter Matters
When I used bargain butter once out of impatience, I found my frosting just wouldn’t whip up light and beautiful. After that letdown, I started splurging for the real stuff, and that subtle richness in every bite made the cupcakes taste undeniably homemade and worth every extra coin.
Making Ahead and Storing for Parties
The cupcakes hold up just fine made the day before, and the fondant caps can even be shaped a week in advance if you store them airtight. If you brush on your edible gold dust just before serving, they’ll gleam impressively right up until dessert time.
- If your kitchen is humid, pop fondant caps in a cool cupboard not the fridge.
- Store frosted cupcakes in a single layer – stacking ruins the swirls.
- Whip any leftover buttercream and freeze for celebratory emergencies.
 Save
Save Graduation comes and goes, but a platter of homemade cupcakes brightens any occasion. Let your kitchen be the spot where celebrations – and sweet little memories – always begin.
Recipe FAQs
- → How do I keep cupcakes moist?
Avoid overmixing once the flour is added, measure flour accurately by spooning and leveling, and bake until a toothpick comes out clean. Using whole milk and a proper butter-to-sugar ratio helps maintain tenderness.
- → Best method to color and add gold shine to fondant?
Use black gel food coloring to tint fondant for deep color. For gold shine, dust edible gold powder or mix gold dust with a tiny amount of clear alcohol or lemon extract to paint highlights; allow to dry before handling.
- → How should I store cupcakes with fondant caps?
Store in an airtight container at cool room temperature for up to a day. For longer storage, refrigerate but bring to room temperature before serving to restore buttercream texture; keep fondant dry and separated from condensation.
- → Can I assemble the fondant caps ahead of time?
Yes—fondant caps can be made several days in advance. Dust with cornstarch, let them fully dry on a flat surface, then store in a single layer inside an airtight container to prevent warping.
- → How do I get smooth, pipeable buttercream?
Start with softened butter, sift powdered sugar, and beat until light and fluffy. Add milk and vanilla gradually, scraping the bowl, and beat until smooth. Chill briefly if it becomes too soft for piping.
- → What are easy ingredient swaps for dietary needs?
Use plant-based butter and a nondairy milk to make a vegan version, and replace all-purpose flour with a tested gluten-free blend for gluten-free servings. Check fondant labels for vegan status and allergen traces.