 Save
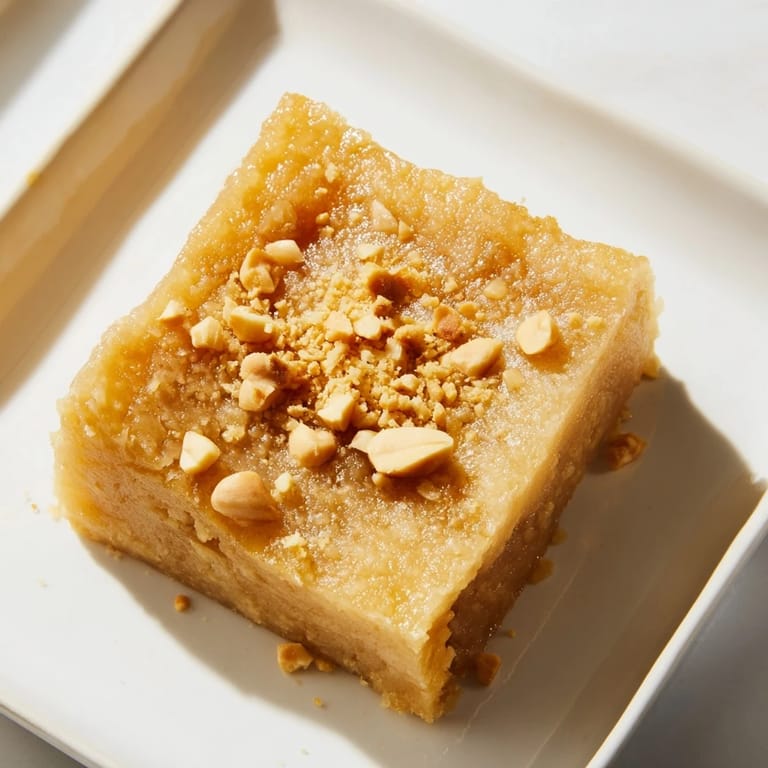
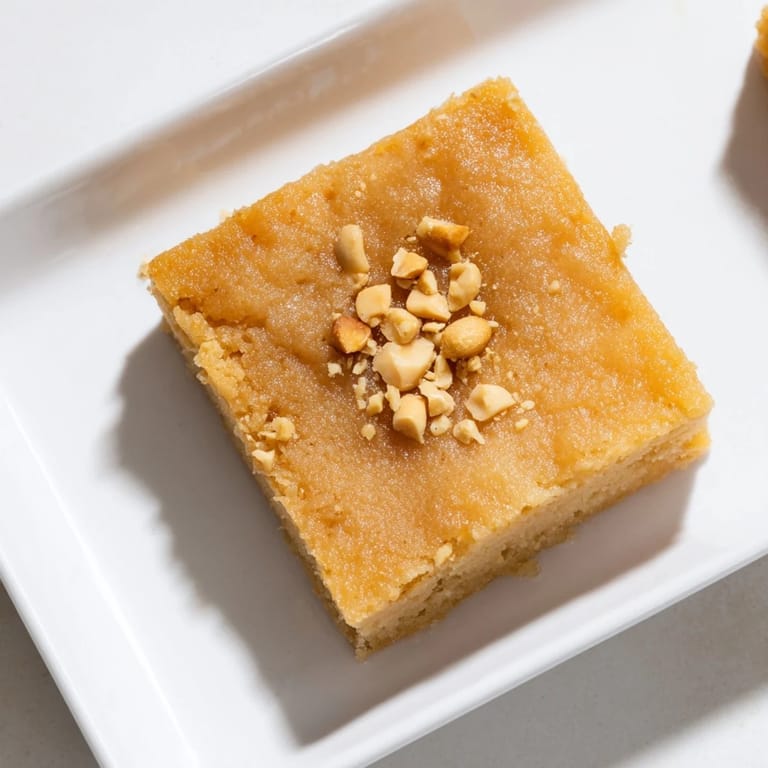
Save The first time I made mochi cake, I wasn't thinking about fusion cooking or food traditions. I was standing in my kitchen on a rainy afternoon, staring at a bag of mochiko flour my neighbor had left me, and a jar of peanut butter that seemed too good to waste in sandwiches. Something clicked. What if I could make something chewy and tender that tasted like peanut butter without being heavy? Three hours later, after a small mishap with the mixing bowl (it was heavier than I expected), I pulled a golden-brown square from the oven and bit into that first piece. It was tender, it was sweet, and it absolutely worked.
I made this for a potluck at work once, cutting it into squares and tucking it into a container, not sure if anyone would even try it. A colleague who usually skips desserts came back asking for the recipe, then told me her daughter wanted to learn how to make it. That moment meant more to me than any compliment about something fancy ever could.
Ingredients
- Sweet rice flour (mochiko): This is the whole foundation, the ingredient that gives mochi cake its signature chew. Don't grab regular rice flour by mistake, it won't work the same way.
- Granulated sugar: One cup might sound like a lot, but it dissolves into the batter and keeps everything moist.
- Baking powder: Just enough to give it a subtle lift without making it fluffy.
- Whole milk and coconut milk: Together they create a tender crumb and that slight richness you taste in every bite.
- Creamy peanut butter: Go for the smooth kind here, something that blends seamlessly into the batter.
- Eggs: They bind everything and add structure without making it dense.
- Melted butter and vanilla extract: The butter adds flavor and moisture, while vanilla just rounds out the whole picture.
Tired of Takeout? 🥡
Get 10 meals you can make faster than delivery arrives. Seriously.
One email. No spam. Unsubscribe anytime.
Instructions
- Get your oven ready and prep your pan:
- Heat to 350°F and either grease a 9x13-inch pan or line it with parchment paper. This matters because mochi cake can stick if you're not careful.
- Mix your dry team:
- In a large bowl, whisk together the sweet rice flour, sugar, baking powder, and salt until it's uniform. You're looking for no lumps hiding in the corners.
- Combine the wet ingredients:
- In another bowl, whisk milk, coconut milk, eggs, peanut butter, melted butter, and vanilla until everything is smooth and the peanut butter is fully incorporated. This takes a bit of elbow grease but it's worth it.
- Bring them together:
- Pour the wet mixture into the dry, then whisk gently until you have a smooth batter with no streaks of flour. Don't overmix, just make sure it's cohesive.
- Into the pan and into the oven:
- Pour the batter into your prepared pan and tap the bottom gently a few times to pop air bubbles. Bake for 45 to 50 minutes until the top is golden and a toothpick comes out clean.
- Cool completely before you slice:
- This is the hardest part because it smells so good, but patience here means clean, neat squares instead of crumbly pieces.
 Save
Save What made this recipe stick around in my kitchen wasn't just how it tasted, but the way it bridged a conversation. My Japanese-American friend took one bite and immediately understood what I was trying to do. She made it for her family, they loved it, and now it shows up at family gatherings. Food that connects people to themselves and each other has a way of becoming essential.
The Joy of Texture
Mochi cake occupies this beautiful space between chewy and tender that you don't get in most American desserts. The sweet rice flour is the magic ingredient that creates that texture, and once you understand what it does, you start seeing it everywhere. The coconut milk adds a subtle richness that doesn't make it taste tropical, just luxurious, while the peanut butter keeps everything grounded and familiar.
Serving and Keeping
Serve it at room temperature when you want the chewy texture to really shine, or chill it if you prefer it a bit firmer. It's equally good both ways, and leftovers stay fresh in an airtight container for several days. I've found it actually improves slightly as it sits, the flavors settling into each other overnight.
Making It Your Own
This recipe is a canvas if you want it to be. Some people love adding a sprinkle of roasted peanuts on top before baking for extra texture and nuttiness. Others swap the coconut milk for evaporated milk if they want something lighter, and honestly both versions are delicious. Serve it with whipped cream and berries and you've got something that feels elegant enough for guests.
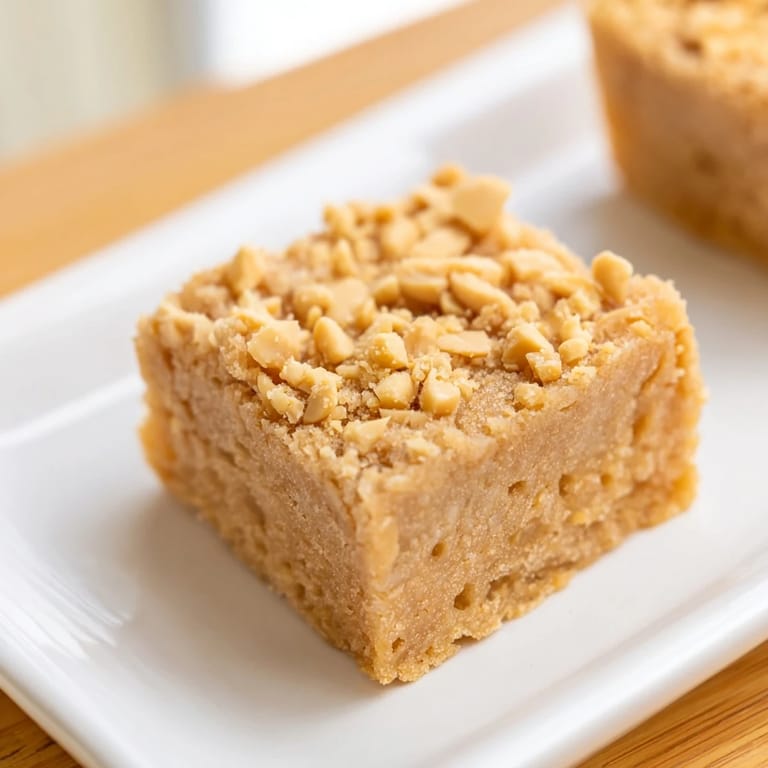
- If you want even more peanut flavor, drizzle peanut butter thinned with a little milk over the top before serving.
- A pinch of sea salt on top before baking brings out the sweetness and the peanut butter in surprising ways.
- This cake is naturally gluten-free, just double-check your ingredient labels if that matters for your table.
 Save
Save This cake has become my go-to when I want something special that doesn't require hours in the kitchen. It's proof that the best recipes are often the ones born from curiosity and a pantry full of random ingredients.
Recipe FAQs
- → What type of flour is used for the mochi?
Sweet rice flour (glutinous rice flour or mochiko) creates the chewy texture essential to mochi.
- → Can I substitute coconut milk with another milk?
Yes, evaporated milk can be used for a lighter flavor, maintaining moisture in the cake.
- → How do I know when the mochi is baked perfectly?
Look for a golden brown top and use a toothpick test; it should come out clean when inserted.
- → Is it necessary to grease the baking pan?
Greasing or lining with parchment prevents sticking and helps remove the mochi easily after baking.
- → Can I add toppings for extra texture?
Sprinkling roasted peanuts on top before baking adds a pleasant nutty crunch.