 Save
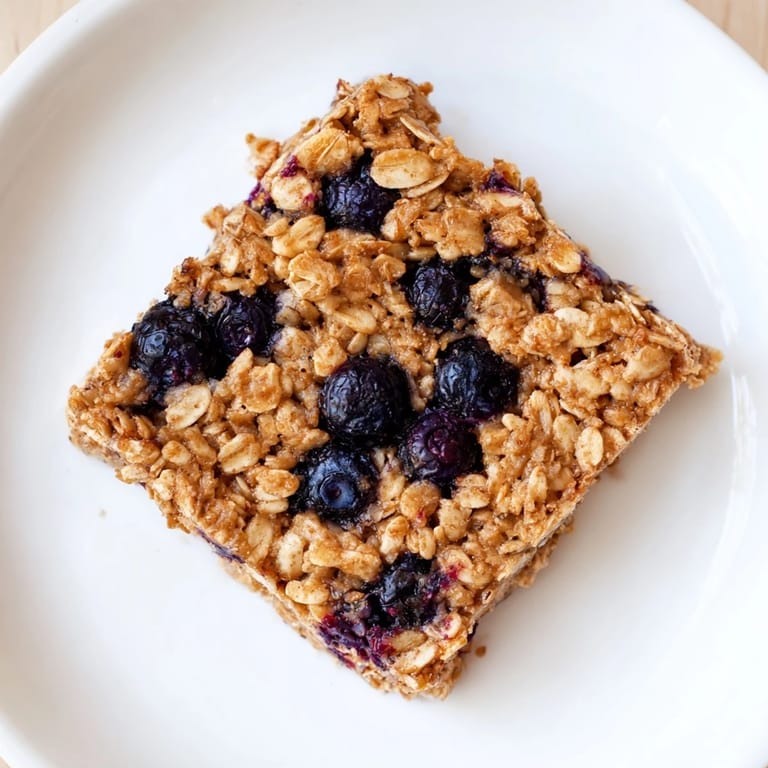
Save There's something magical about biting into a bar that tastes indulgent but actually fuels your body—I discovered that the hard way when I was rushing out the door one morning with nothing but cold coffee and regret. A friend handed me a homemade blueberry banana oatmeal bar she'd made the night before, and suddenly my whole day shifted. It was chewy, naturally sweet, and so satisfying that I stopped at the coffee shop just to talk about how good it was. That moment sparked my obsession with making these bars at home, tweaking them until they hit that perfect balance of wholesome and craveable.
I'll never forget the first time I brought a batch to my sister's house after she'd been complaining about her snack drawer being empty and uninspiring. She ate three bars straight from the container while telling me about her week, and then asked if I could just make them a permanent fixture at her place. Now every time I visit, there's always a request for a fresh batch, and I've started experimenting with different berries just to keep her interested.
Ingredients
- Old-fashioned rolled oats (2 cups): The hearty base that gives these bars their chewy texture and staying power—steel-cut oats will make them too dense, so don't swap them in unless you enjoy dense breakfast blocks.
- Vanilla protein powder (1/2 cup): This is what transforms breakfast into actual nutrition, but make sure you buy a brand you'd actually enjoy eating, because that vanilla note really matters in the final bite.
- Ripe bananas (2 large, mashed): The sweeter and more spotted your bananas, the less additional sweetener you'll need—I've learned this lesson by over-sweetening bars made with barely-yellow fruit.
- Honey or maple syrup (1/4 cup): Both work beautifully, though honey gives a slightly silkier crumb while maple adds a subtle earthiness that some people find irresistible.
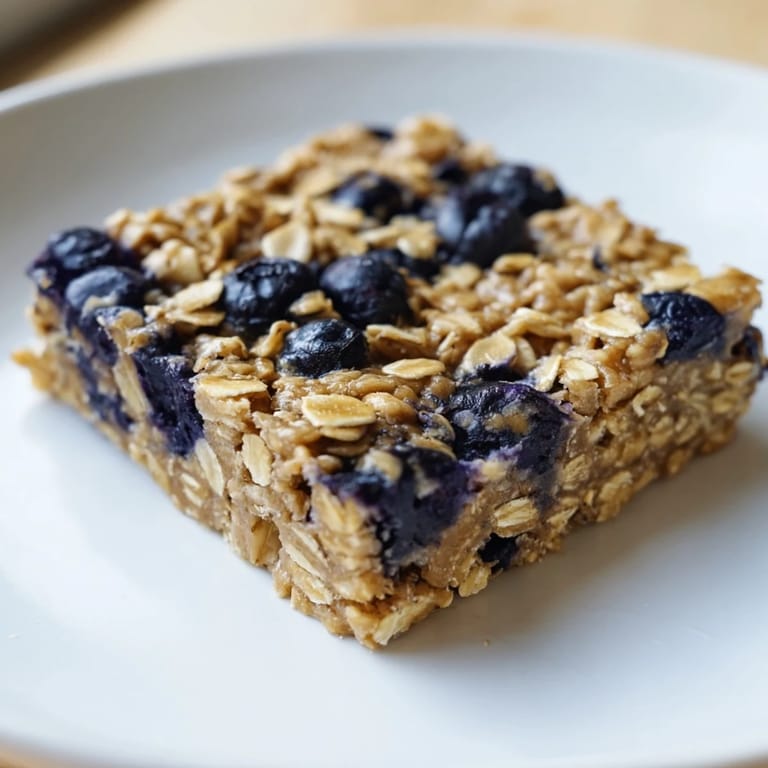
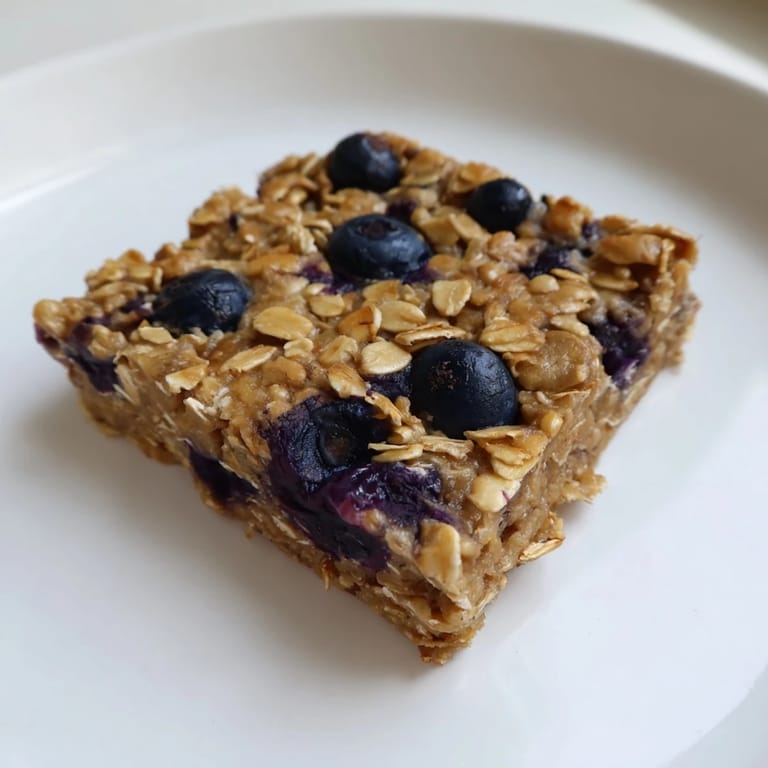
- Fresh or frozen blueberries (1 cup): Keep frozen berries frozen when you fold them in, because thawing them releases their juice and turns your batter gray instead of speckled with pretty blue pockets.
- Ground cinnamon (1/2 teaspoon): Just enough to warm the flavor without announcing itself loudly—it's the secret that makes people ask what your secret ingredient is.
- Unsweetened applesauce (1/4 cup): This adds moisture without heaviness, which is why the bars stay chewy even after a few days instead of drying out like hockey pucks.
- Eggs (2 large): The binder that holds everything together, and honestly, room-temperature eggs mix more smoothly than cold ones straight from the fridge.
- Vanilla extract (1 teaspoon): A small amount that deepens the whole flavor profile without making anything taste medicinal.
- Melted coconut oil or butter (2 tablespoons): Just enough fat to create that tender crumb without making them greasy—I've learned this by over-oiling a batch and ending up with bars that felt slick on my fingers.
- Baking powder (1 teaspoon): Gives the bars a gentle lift so they're not completely dense and foundation-like.
- Salt (1/4 teaspoon): A tiny pinch that makes every other flavor pop more—it's not detectable on its own, but you'll notice if you forget it.
Tired of Takeout? 🥡
Get 10 meals you can make faster than delivery arrives. Seriously.
One email. No spam. Unsubscribe anytime.
Instructions
- Get your oven ready and set the stage:
- Preheat to 350°F and line your 8x8-inch pan with parchment paper, letting the edges hang over the sides so you can lift the entire slab out later instead of wrestling individual bars out of the pan like you're defusing a pastry bomb.
- Combine everything dry:
- Whisk your oats, protein powder, cinnamon, salt, and baking powder in a large bowl until they're evenly distributed—this is where the cinnamon gets its chance to spread throughout instead of clumping in one bitter pocket.
- Wake up the wet ingredients:
- Mash your bananas until they're smooth with barely any lumps, then add the honey, applesauce, eggs, vanilla, and melted coconut oil, whisking until the whole mixture looks silky and unified—this is the step that determines your bar's final texture, so don't rush it.
- Bring wet and dry together:
- Pour the wet mixture into the dry and stir until just combined, being careful not to overwork the batter because that activates the gluten and makes bars tough instead of tender.
- Fold in the blueberries with intention:
- Add your blueberries gently, stirring just until they're distributed, especially if you're using frozen ones since aggressive mixing will turn them into dark streaks instead of keeping them as distinct pockets of juiciness.
- Spread and bake:
- Pour the batter into your prepared pan and smooth the top with a spatula, then slide it into the oven for 28–32 minutes until the edges are golden and a toothpick comes out clean—start checking at 25 minutes if your oven runs hot like mine does.
- Cool with patience:
- Let the bars cool completely in the pan before attempting to cut them, because warm bars will crumble no matter how sturdy they look, and cutting them after they've fully set gives you clean, Instagram-worthy edges.
 Save
Save I think what makes these bars special isn't just how they taste, but how they've become the thing I reach for when I need something that feels both comforting and good for me at the same time. They're proof that breakfast doesn't have to be a compromise between what's convenient and what's actually nourishing.
Storage and Make-Ahead Magic
These bars are genuinely better when you make them ahead, which is the whole point of having them on hand for mornings when you're running late. They keep for three days at room temperature in an airtight container, up to a week refrigerated, and they also freeze beautifully for up to a month if you wrap them individually in foil and stack them in a freezer bag. I've found that pulling one out of the freezer the night before means you have a perfectly thawed bar by morning, which feels like giving yourself a gift when you're groggy and barely functioning.
Customization Ideas That Actually Work
The beauty of this recipe is that it's flexible enough to adapt to what you have on hand or what you're craving on any given week. I've made versions with chopped pecans for crunch, swapped the blueberries for raspberries when they were on sale, and even added a tablespoon of cocoa powder one time when I was feeling adventurous and wanted something that tasted almost like a brownie. You can also skip the protein powder entirely and use oat flour instead if you prefer bars that are more traditional and less protein-forward, though you might need to add an extra tablespoon or two of honey to compensate for the change in binding power.
Why These Bars Beat Grabbing Something on Your Way Out
There's something deeply satisfying about knowing exactly what's in your breakfast instead of reading a label with seventeen ingredients you can't pronounce. These bars are also noticeably more affordable than buying pre-made protein bars at the coffee shop, especially if you buy your oats and protein powder in bulk. Beyond the practical stuff, homemade bars just taste better—they're softer, chewier, and way less likely to taste like cardboard that's been sitting in a warehouse since last summer.
- Make a full batch on Sunday and you've basically guaranteed yourself breakfast for most of the week without any morning decisions required.
- If you're taking these to work or on a hike, they're sturdy enough to throw in a bag without worrying they'll crumble into dust.
- These also make genuinely impressive gifts when you package them nicely, because homemade always feels more thoughtful than store-bought.
 Save
Save These bars became my answer to mornings when I don't have time to cook but I also refuse to let breakfast be an afterthought. They're still my go-to grab-and-go, and I keep a batch in the freezer at almost all times.
Recipe FAQs
- → Can I use frozen blueberries?
Yes, you can use frozen blueberries without thawing. Fold them gently into the batter to prevent excess moisture.
- → How long do the bars stay fresh?
Store bars in an airtight container at room temperature for up to 3 days or refrigerate for up to one week.
- → Can I substitute the protein powder?
Yes, you can replace protein powder with an equal amount of oat flour for a different texture and no added protein.
- → Are these bars suitable for dairy-free diets?
Use dairy-free protein powder and substitute butter with coconut oil to make the bars dairy-free.
- → What tools are needed to prepare these bars?
You will need mixing bowls, a whisk, spatula, an 8x8-inch baking pan, parchment paper, and measuring cups and spoons.
- → How can I add crunch to the bars?
Incorporate 1/4 cup of chopped nuts or seeds into the batter for extra texture and flavor.