 Save
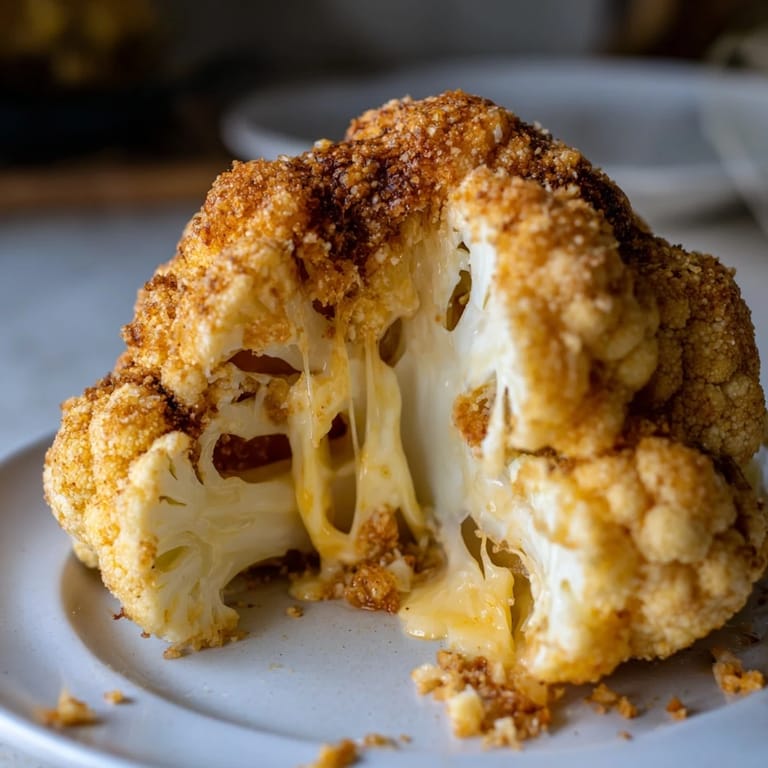
Save The first time I brought this to a dinner party, my friend actually laughed when I set it on the table. A whole cauliflower? she whispered, eyebrows raised. Forty minutes later, she was scraping melted cheese off the baking tray with her fork and asking for the recipe. That's when I knew this wasn't just a vegetable dish—it's a showstopper that happens to be vegetarian.
I discovered this technique during a rainy Sunday when I wanted something comforting but not heavy. The house filled with the most incredible aroma as it roasted—garlic, nutmeg, and slowly caramelizing cheese. My husband wandered into the kitchen three times asking if it was done yet. Now it's our go-to when we want to feel fancy without actually trying that hard.
Ingredients
- 1 large whole cauliflower: Look for one that feels heavy and tight, with no dark spots on the florets
- 1 tbsp olive oil: This helps the exterior develop that gorgeous golden color as it roasts
- ½ tsp salt and ¼ tsp black pepper: Simple seasoning that lets the cheese filling shine
- 150 g cream cheese, softened: Room temperature cream cheese blends smoothly into the filling
- 100 g shredded mozzarella cheese: Creates those irresistible cheese pulls when you cut into it
- 50 g grated Parmesan cheese: Adds a salty depth that balances the creamy cheeses
- 2 tbsp chopped fresh chives: Their mild onion flavor brightens the rich cheese mixture
- 1 garlic clove, minced: One clove is plenty—garlic intensifies as it roasts
- ½ tsp smoked paprika and ¼ tsp ground nutmeg: This unexpected combo adds warmth without being spicy
- 1 tbsp milk: Just enough to loosen the filling to a spreadable consistency
- 50 g shredded cheddar cheese: Forms a crispy golden crust on top
- 2 tbsp breadcrumbs: Gluten-free if needed—they create that satisfying crunch
- 1 tbsp melted butter: Mix this with the breadcrumbs so they toast evenly in the oven
Tired of Takeout? 🥡
Get 10 meals you can make faster than delivery arrives. Seriously.
One email. No spam. Unsubscribe anytime.
Instructions
- Get your oven ready:
- Preheat to 200°C (400°F) and line a baking tray with parchment paper for easy cleanup
- Prep the cauliflower:
- Trim off the outer leaves and cut just enough from the base so it sits flat, keeping all florets intact
- Blanch the cauliflower:
- Boil a large pot of salted water and cook the whole head for 8–10 minutes until just tender, then drain well
- Make the cheese filling:
- Mix cream cheese, mozzarella, Parmesan, chives, garlic, smoked paprika, nutmeg, and milk until completely smooth
- Create stuffing space:
- Once the cauliflower is cool enough to handle, make deep cuts between florets and into the base with a small knife
- Stuff generously:
- Press the cheese mixture into all the crevices and center, using a spoon or your fingers to push it in deep
- Season the outside:
- Brush the cauliflower all over with olive oil and sprinkle with salt and pepper
- Add the crispy topping:
- Mix cheddar cheese with breadcrumbs and melted butter, then scatter evenly over the cauliflower
- Roast until golden:
- Bake for 40–45 minutes until the cheese is bubbling, the topping is browned, and a knife slides in easily
- Rest and serve:
- Let it sit for 5 minutes to firm up slightly, then slice into wedges like a cake
 Save
Save Last Christmas, my vegetarian aunt was dreading another year of sides while everyone else ate turkey. I made this cauliflower and she actually teared up when I set it down at her place setting. It's not just tolerated—it's celebrated.
Making It Your Own
I've experimented with adding chopped sun-dried tomatoes to the cheese filling when serving it alongside Italian dishes. The tangy sweetness cuts through all that richness beautifully. Once I threw in some sautéed mushrooms and my mushroom-hating husband didn't even notice them until I pointed it out later.
What To Serve With It
A crisp green salad with an acidic vinaigrette balances the creaminess perfectly. I usually serve roasted carrots or asparagus on the side for color. On cold nights, a bowl of tomato soup alongside this feels like the most comforting meal imaginable.
Storage And Reheating
Leftovers keep remarkably well in the refrigerator for up to three days. The texture actually improves as flavors meld together. Reheat slices in a 180°C oven for about 15 minutes until the cheese bubbles again. The microwave works in a pinch but you'll lose that crispy breadcrumb topping.
- Wrap individual wedges in foil before freezing for up to two months
- Thaw overnight in the refrigerator before reheating
- The breadcrumb topping won't be quite as crisp after freezing, but it's still delicious
 Save
Save There's something deeply satisfying about turning a humble vegetable into the star of the table. This dish reminds me that comfort food doesn't need meat to feel special.
Recipe FAQs
- → How do I keep the cauliflower intact while hollowing it out?
After pre-cooking the cauliflower until just tender, use a small sharp knife to make careful, strategic cuts between the florets and into the base. Work gently and avoid cutting too deep into the outer edges to maintain structural integrity. Use a spoon to press the filling firmly into crevices rather than forcing it with the knife.
- → Can I prepare the cauliflower ahead of time?
Yes, you can pre-cook and stuff the cauliflower up to 4 hours in advance. Cover it with plastic wrap and refrigerate. When ready to bake, add an extra 5-10 minutes to the cooking time since it will be cold. You can also apply the topping just before baking for maximum crispness.
- → What are good substitutes for the cheese filling?
Try ricotta mixed with spinach and garlic for a lighter option, or replace some cream cheese with goat cheese for tanginess. You can also add sun-dried tomatoes, roasted red peppers, or sautéed mushrooms to the filling for extra depth. Keep the proportions similar to maintain the right texture.
- → How do I know when the cauliflower is fully cooked?
Pierce the thickest part of the cauliflower with a knife—it should slide through easily. The florets should be tender but still hold their shape. The exterior should be golden brown and the cheese topping bubbling at the edges. Cooking time varies based on cauliflower size, so start checking around 40 minutes.
- → Is this suitable for a gluten-free diet?
Absolutely. Use certified gluten-free breadcrumbs for the topping, and verify that all cheese and other ingredients are gluten-free. The core dish is naturally gluten-free and makes an excellent vegetarian and gluten-free main course. Double-check your ingredient labels to be certain.
- → What's the best way to serve this dish?
Slice the roasted cauliflower into wedges at the table for maximum visual impact. Serve warm with a crisp green salad dressed with lemon vinaigrette, roasted root vegetables, or crusty bread to soak up any cheesy juices. A light white wine pairs beautifully with the rich, savory flavors.